Cheque Printing Software Help Videos
Installation Video
Watch our installation video to understand to install cheque printing software in your PC.
Configuration Video
View our configuration video to configure cheque printing software for your needs.
Adding Cheque Formats
Our adding new cheque format video will help you to add new cheque templates.
FAQ's & Videos
Table of Contents
Frequently Asked Questions
How to print cheques beautifully?
Using our cheque printing software you can print beautiful error-free cheque with precise alignment. You can use any printer to print cheques easily.
How to print cheques vouchers?
Cheque voucher is instantaneously generated along with printed cheques. You can choose which type vouchers like brief or detail to print.
How to print cheques letters?
Cheque letters are instantaneously generated along with printed cheques. You can which type letters like brief or detail to print.
Do I need a special Printer for Printing Cheques?
You can use any available printer to print checks by Cheque Printer Software. Desk-jet, Office-jet, Laser-jet, All in One Inkjet etc. can be used. Laser-jet will be preferred for nice quality print.
How long will it take to learn using Cheque Software?
It takes just 10 minutes to configure and learn the software. Intuitive user interface design will enable you for a smoother learning curve. Help Videos are available for quick reference.
Can I use any bank cheques for Cheque Printing?
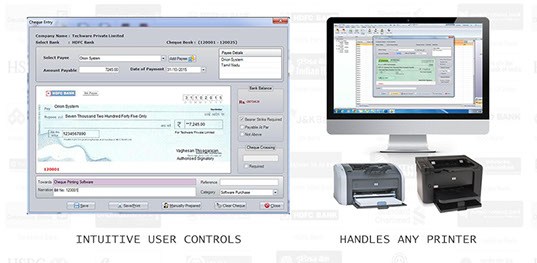
Cheque printing software handles any cheque formats & any cheque size to print beautiful cheques. The user can add any number of cheque formats and align the fields with ease using our intuitive user controls.
Cheque Printing Software Installation Video
ChequeManager Installation Steps
Follow the steps below to down and install “ChequeManager”.
- Download the setup file from the download link provided. (eg. CM-Setup-17Nov2011.zip)
- Extract (Unzip) the setup file. You will have two files in it. (setup.exe & ChequeManagerSetup.msi)
- Run the Setup.exe file. You will need internet connection for the setup to download prerequisite softwares from the internet. (Dot Net Frame Work 3.5, Crystal Report Basic – VS 2008, MS Office System Runtime 3.0)
- Please follow the screen instructions to complete the installation.
- After Installation ChequeManager Icon will be created in your desktop.
- Double click the ChequeManager icon to start the ChequeManager software.
- Then go to menu Settings>Database>Initialize>browse the path and click Save. (eg. D:/Programfiles/OrionSystem/ChequeManager)
- Please go to menu Tools>Activation>Temporary>and Load Temporary Activation File (eg. CM-Temp-2020-02.actv) and click Activate.
- ChequeManager default Login Details: Username: admin Password: admin
Cheque Printing Software Configuration Video
ChequeManager Configuration Steps
- Company Creation Menu>Master>Company>Creation>Fill the required details and Save to create a Company. You can create 3 Companies in standard and professional editions of ChequeManager. Then select the company in right side column to proceed further.
- Bank Creation Menu>Master>Bank>Creation>Fill the required details and Save to create a Banks. You can create any number of Banks under a company.
- Assigning Cheque Formats to Banks Menu>Master>Banks>Cheque Format>Please select the appropriate bank formats for respective banks and save it. You can add new formats by clicking new format button. Select the scanned image of the bank cheque and give a appropriate name and save it. Now you can find the cheque formats in the previous form. Align the respective fields using the tools give and save it.
- Adding & Setting Printers Menu>Settings>Add Printer>Please add appropriate printers to ChequeManager to print cheques. Menu>Settings>Printer Settings> Choose desired settings and save to print cheques. (Landscape and Middle will be ideal for Laser Printers). Please ensure the paper size in the printer control panel as A4.
- Cheque Book Creation Menu>Cheques>Cheque Book Creation>Create Cheque Books of desired number cheque leaves.
- Start using ChequeManager You can find the cheque books created under banks in main screen. Click and select the desired cheque leave to make an entry and print your cheques.
Cheque Printing Software Adding New Cheque Formats Video
ChequeManager Adding New Cheque Formats
- Please set scan setting in scanner software as follows Scan Image: Color Scan Resolution:75dpi or 75ppi Output:jpeg or jpg.
- Please ensure the cheque is straight and if possible use a color sheet in the background. It helps to crop the cheque image exactly
- The result image approximately should be 600 pixels by 270 pixels(For Cheque Size of 203mm by 93m). If it is plus or minus 3 Pixels is ok. If these things are follwed wysiwyg will be achieved.
- Go to Menu Master>Bank>ChequeFormat>Add New>Please browse and select new cheque image and give a appropriate name and save it. Go to previous form then select bank and the new cheque format. Then align the fields using the tools available and save it.